arcanepython.github.io
GitHub Desktop tutorial repository
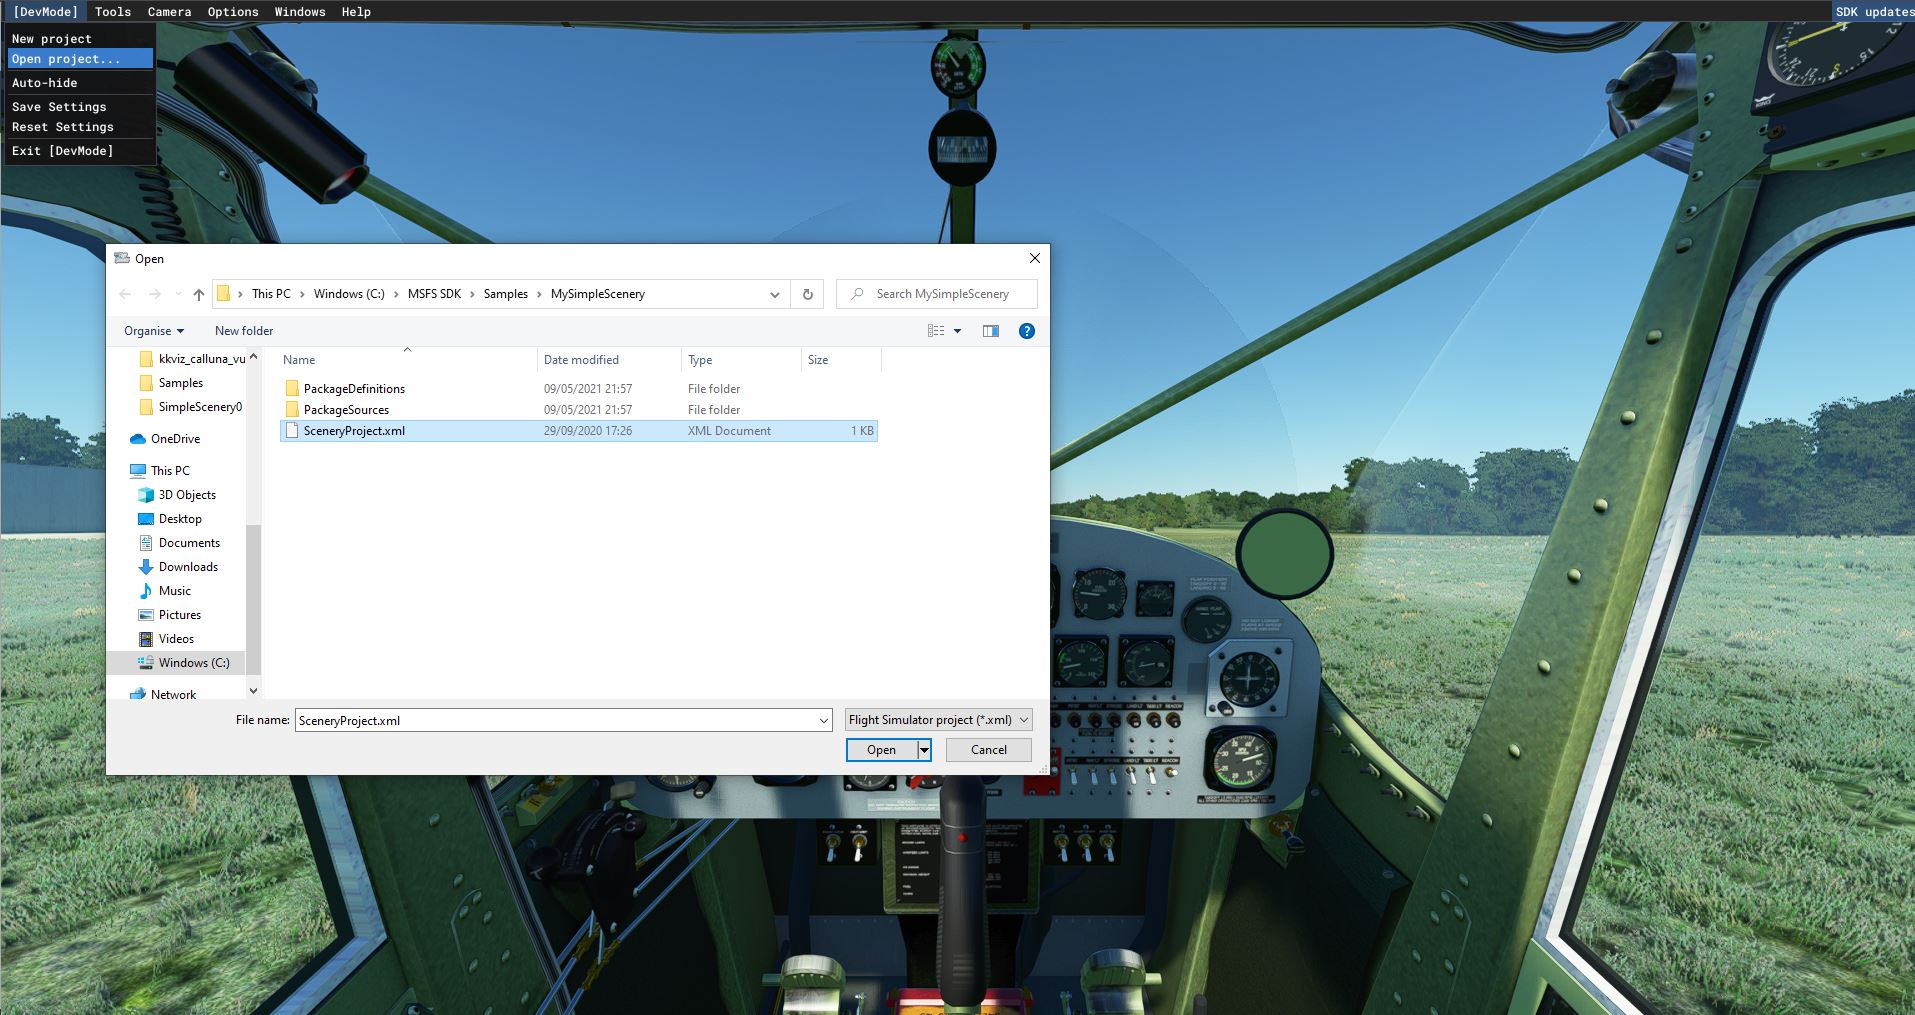
First start a flight in MSFS. Projects can only be opened when you start a flight, because that initializes BING.</br> The example project is located at EHBE Malden Airfield in the Netherlands.
So it is best to start loading EHBE Malden Airfield. Then go General Options an set Developer mode.

Click here to download the Example MSFS scenery project
I placed the project files in MSFS SDK\Samples, but you could unpack the zipfile anywhere else on your disk.
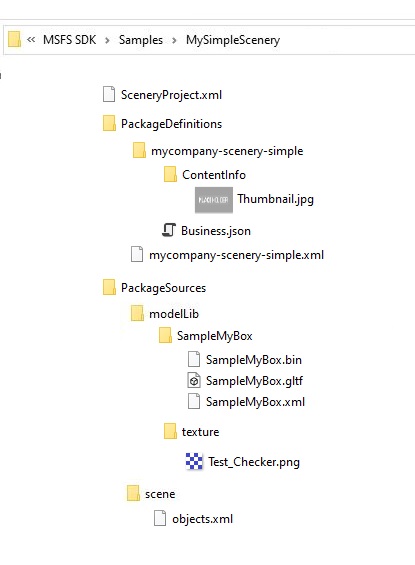
Below overview shows the directories and files in the Example project
Now, open the project in MSFS,
Make sure you open the console,
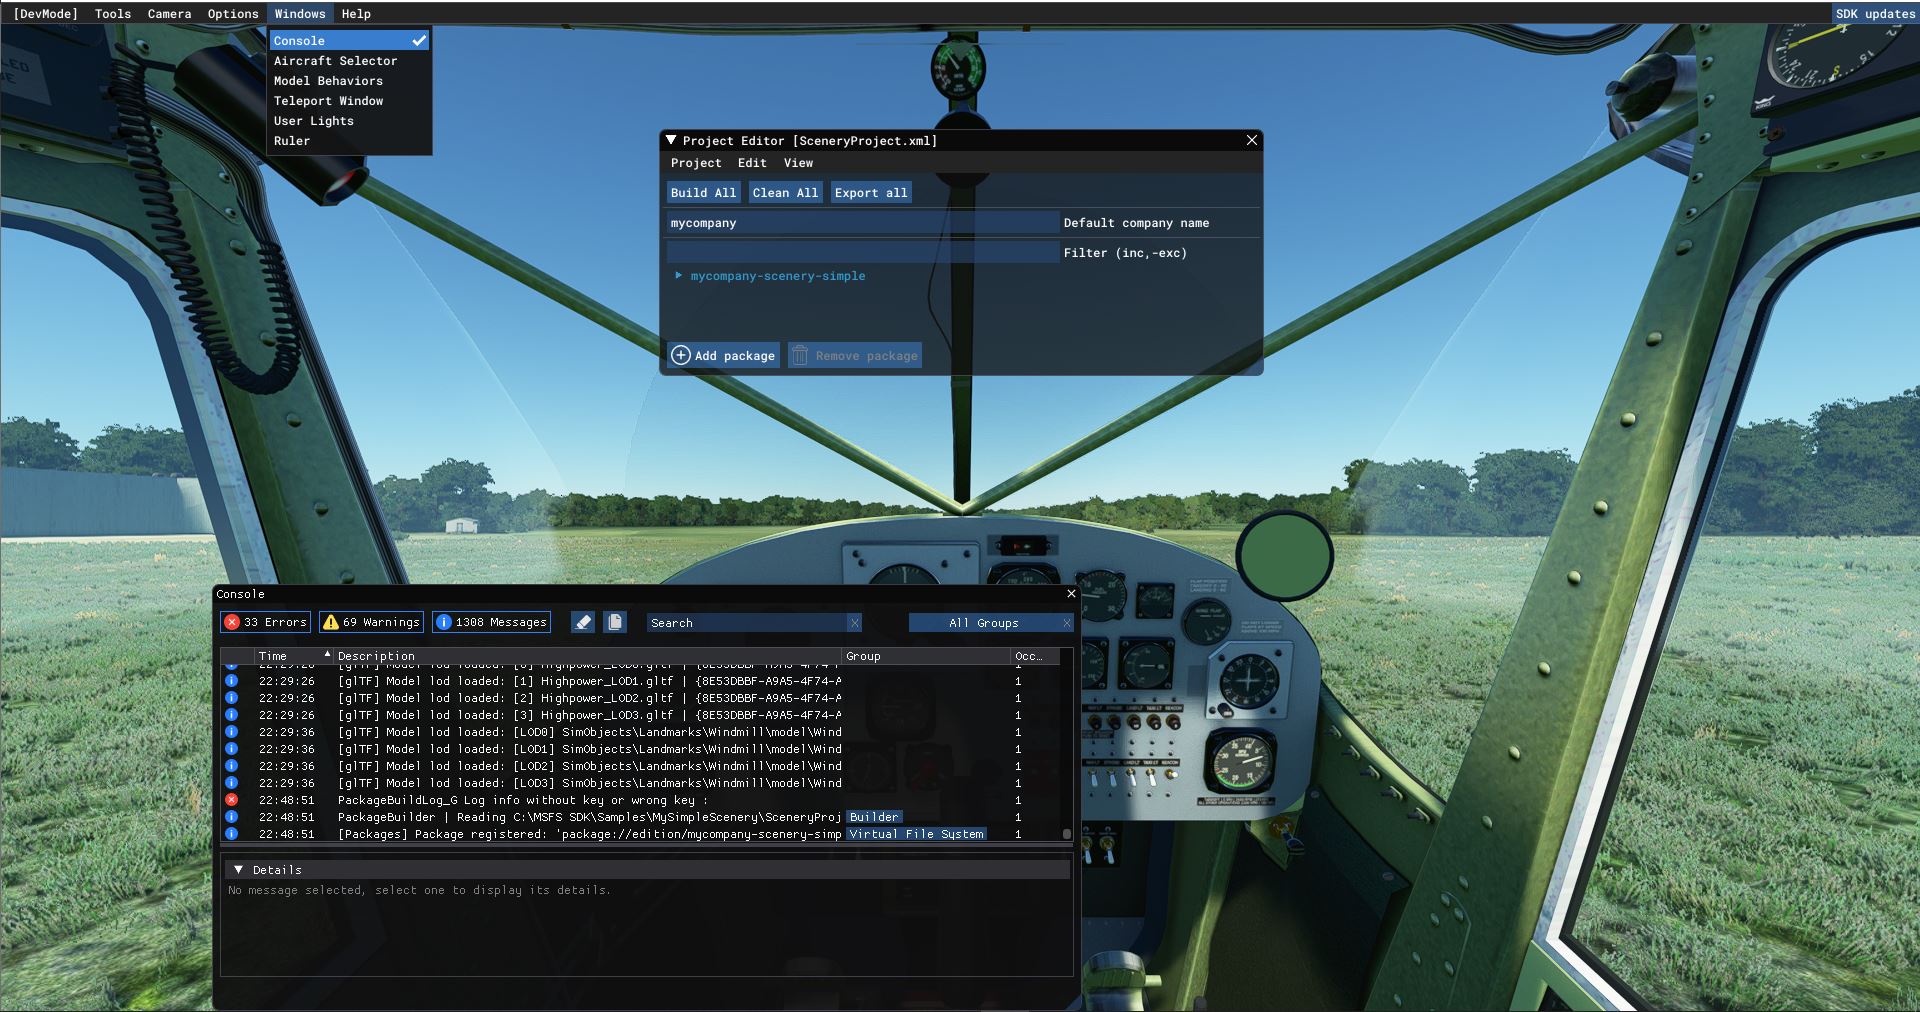
.. and CLEAR the console,
Then click Project - Build
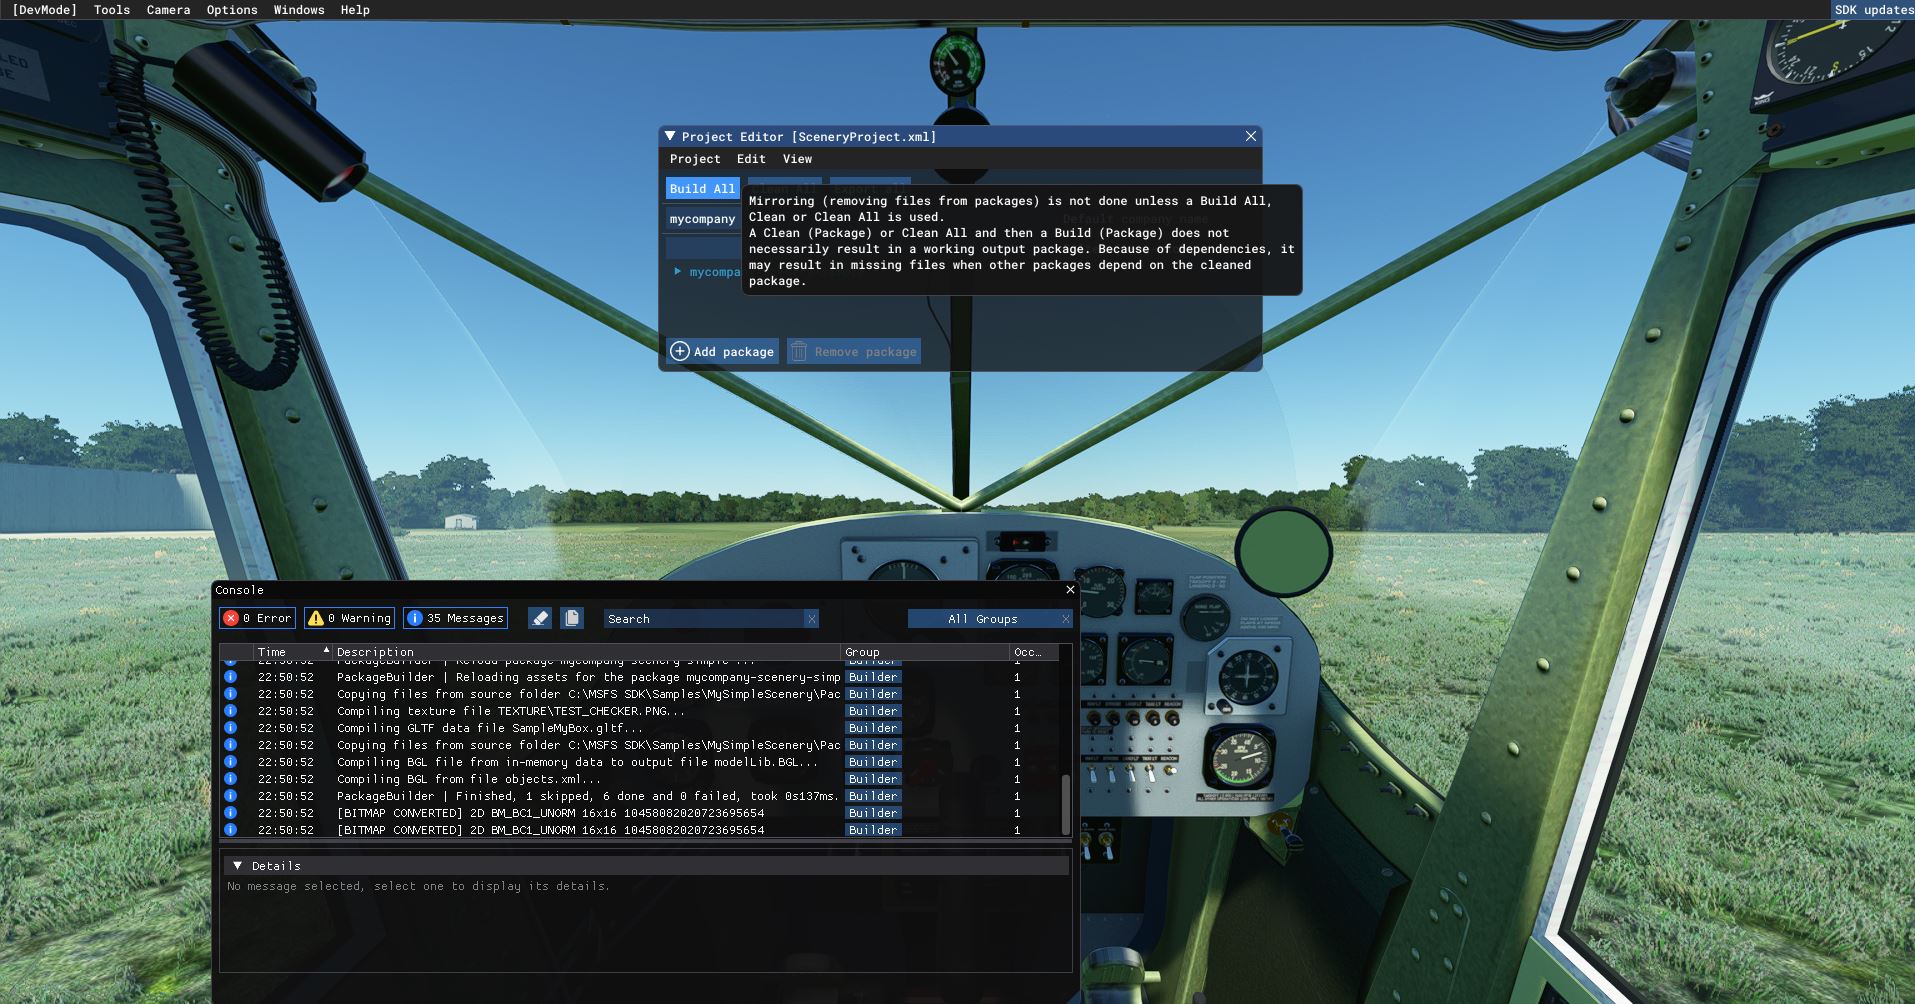
.. and check the console. If it shows errors, clear it again and Project - Build, the console should have 0 errors.
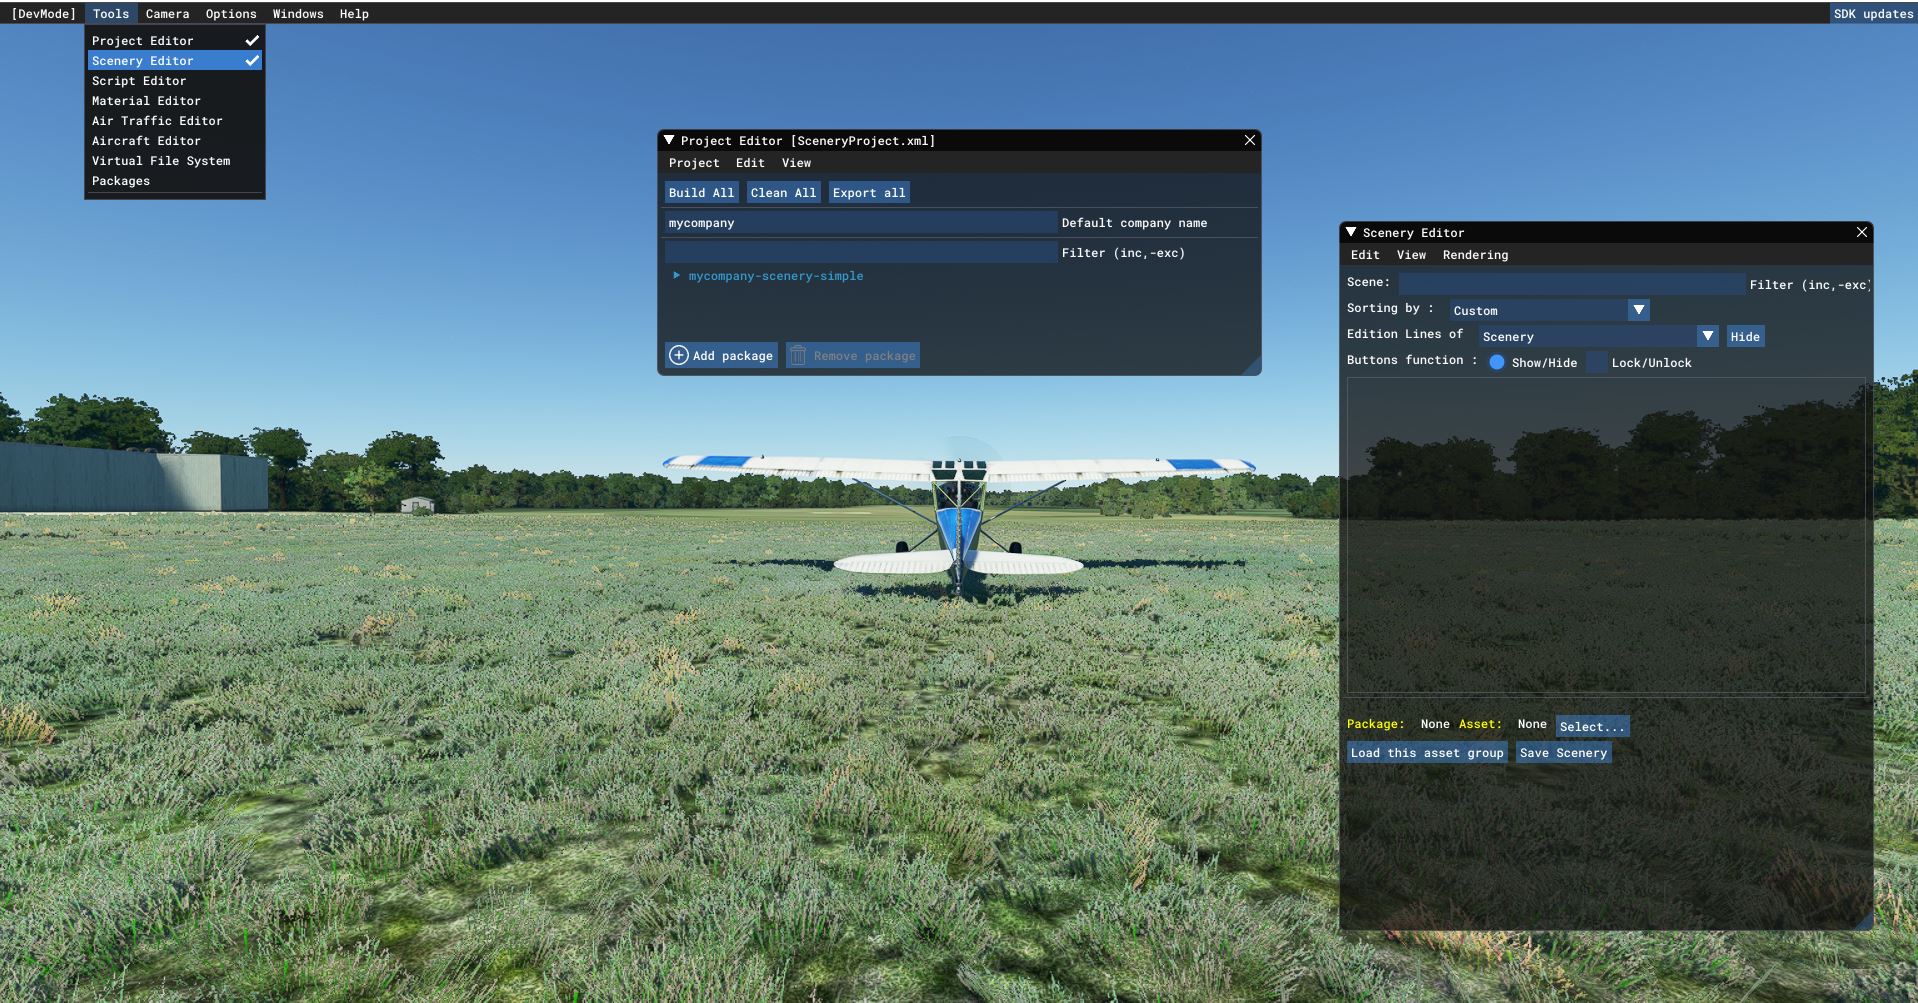
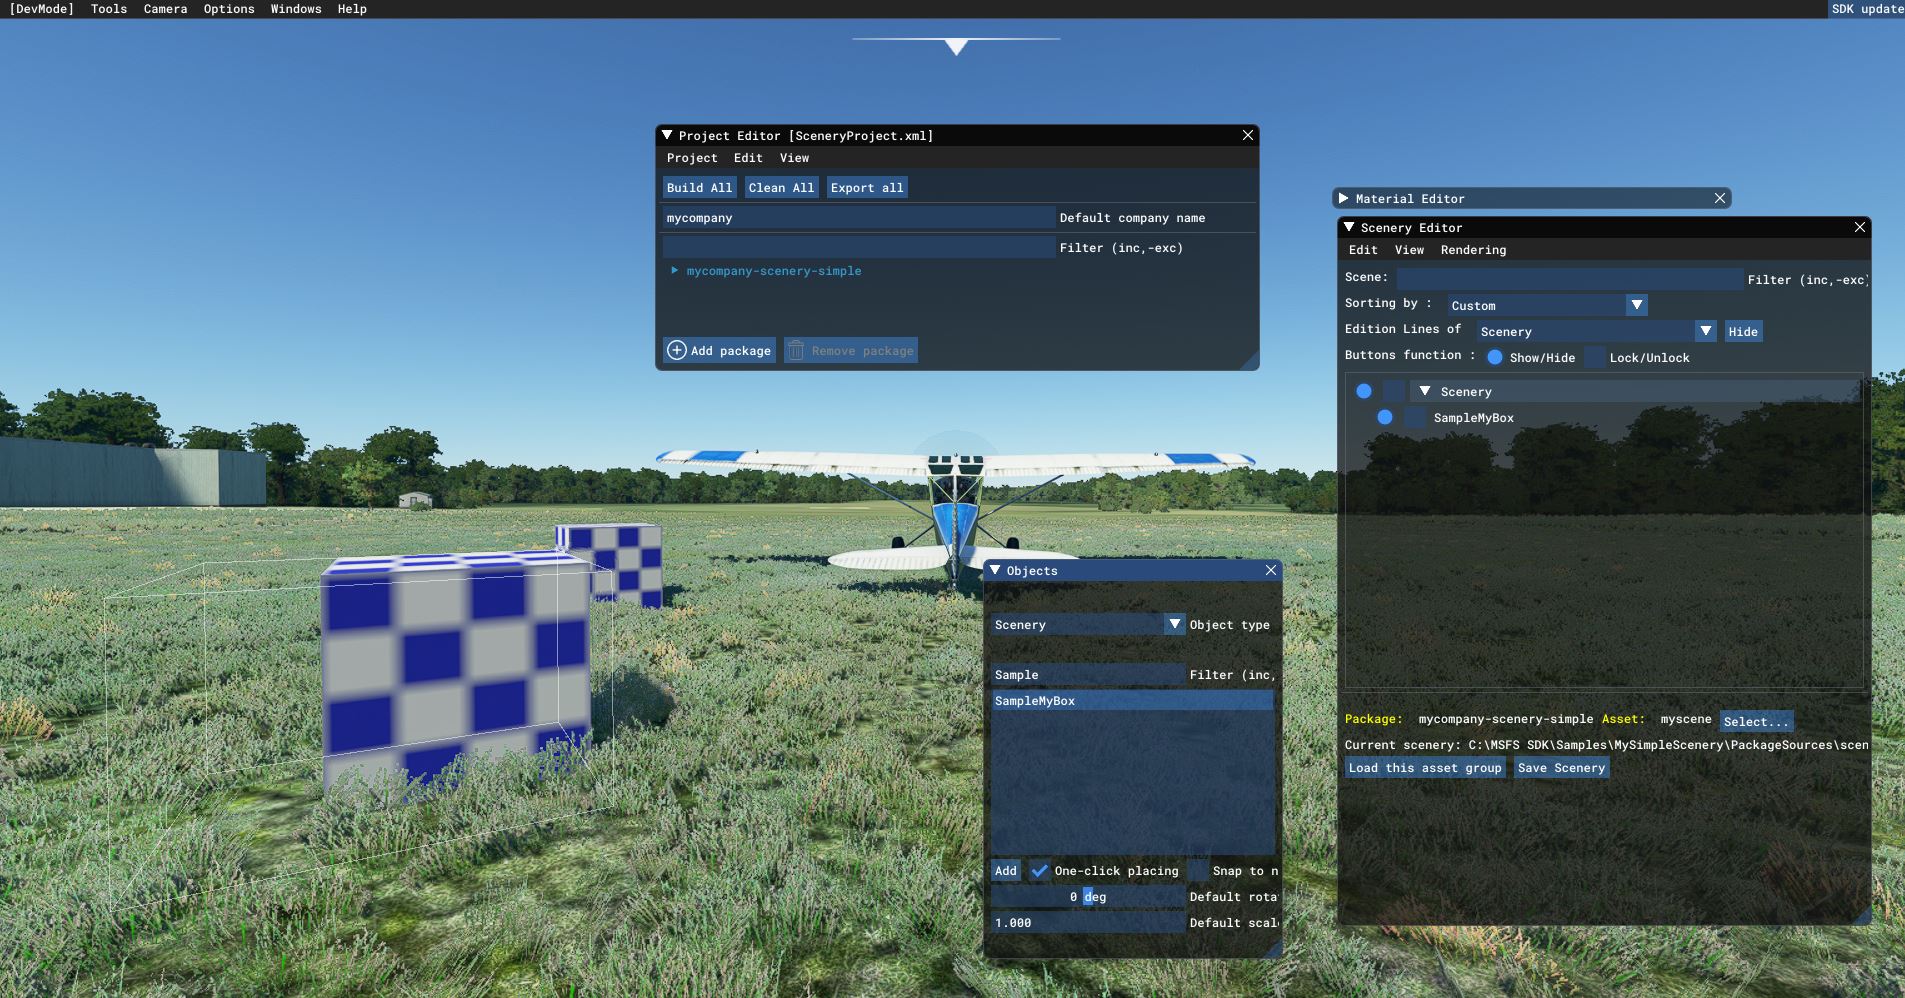
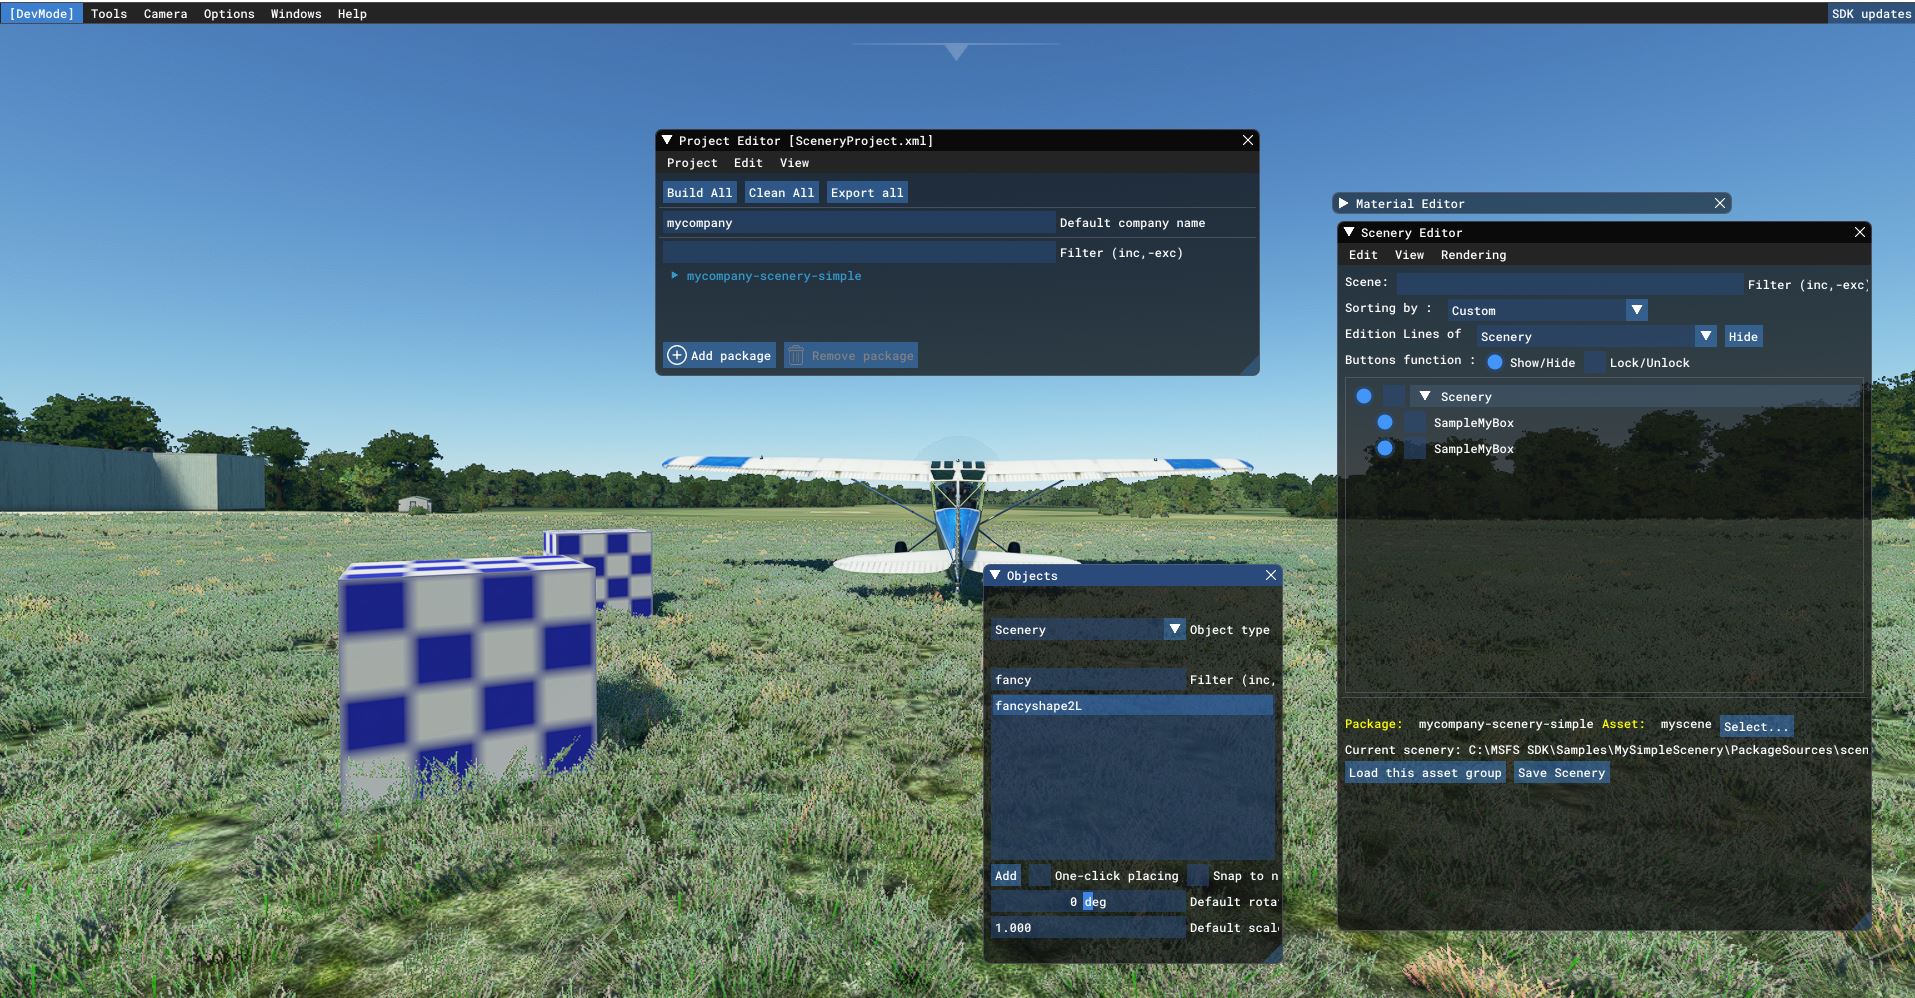
Then, open the Scenery editor via Menu Tools Scenery Editor,
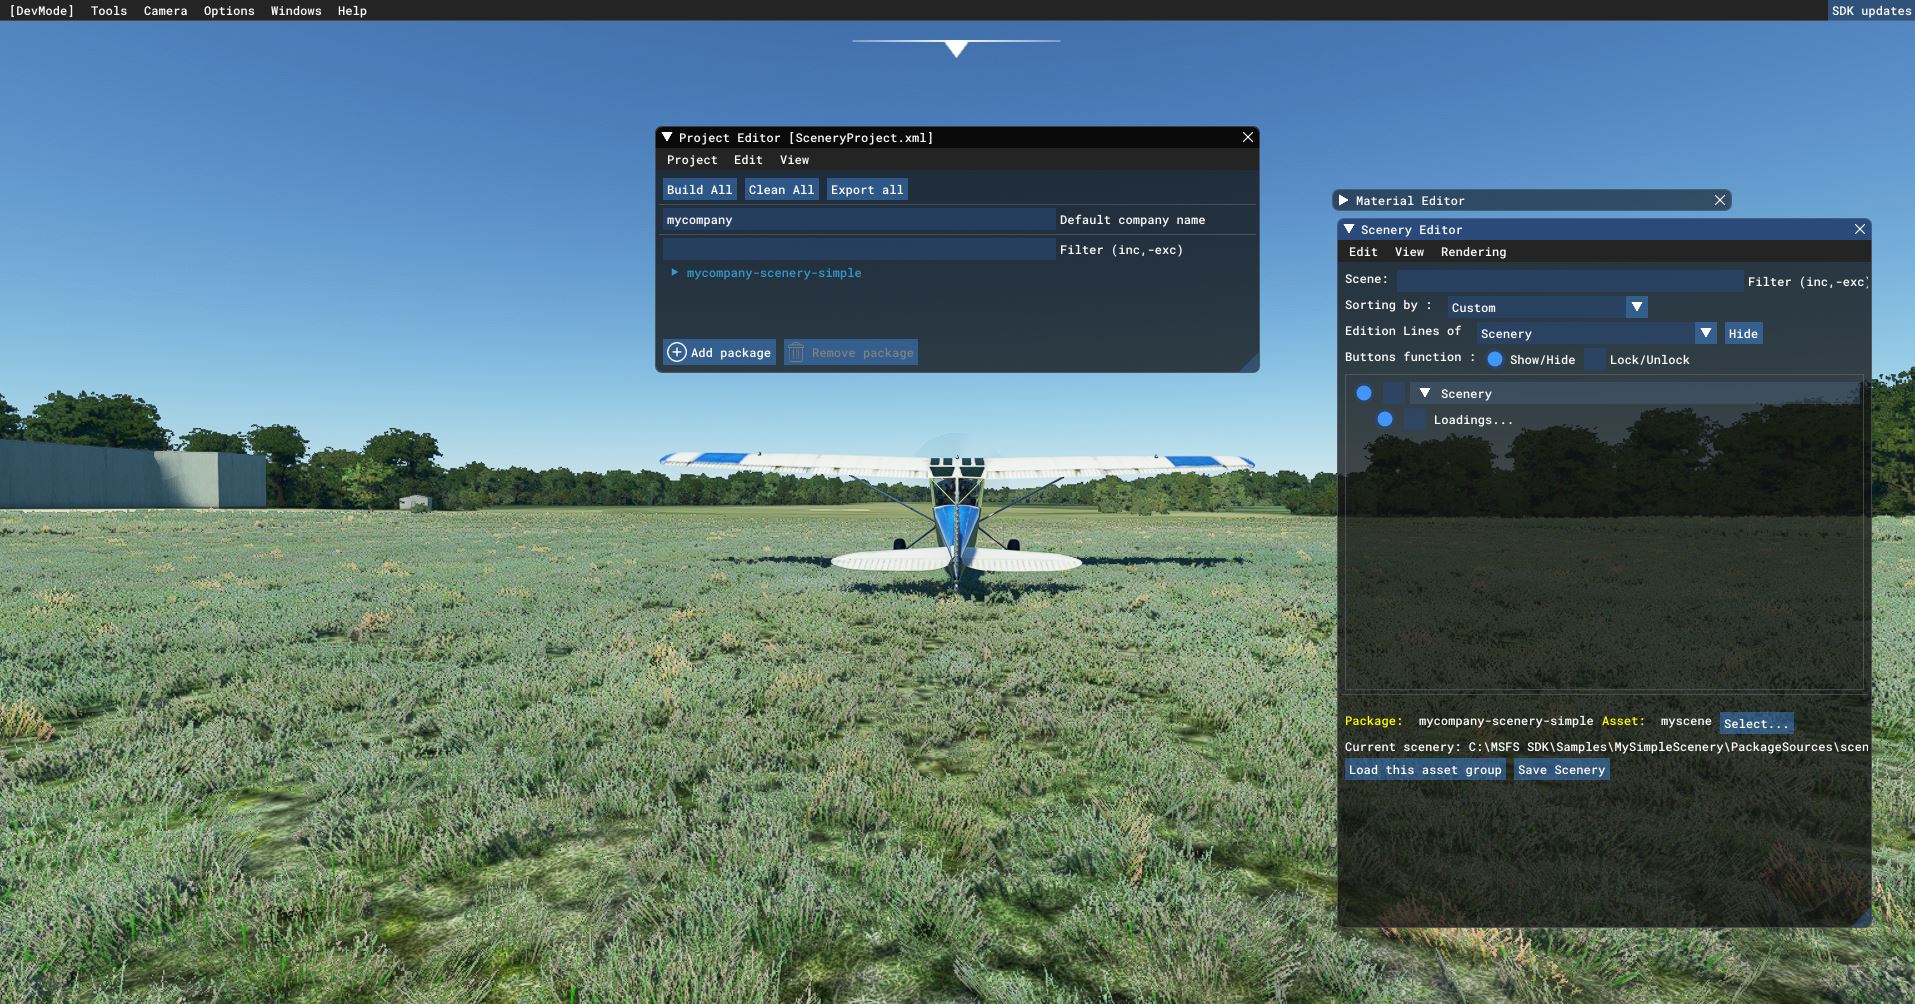
When it is enabled, click Load this assset group, else use Select to select the Asset.
 </img>
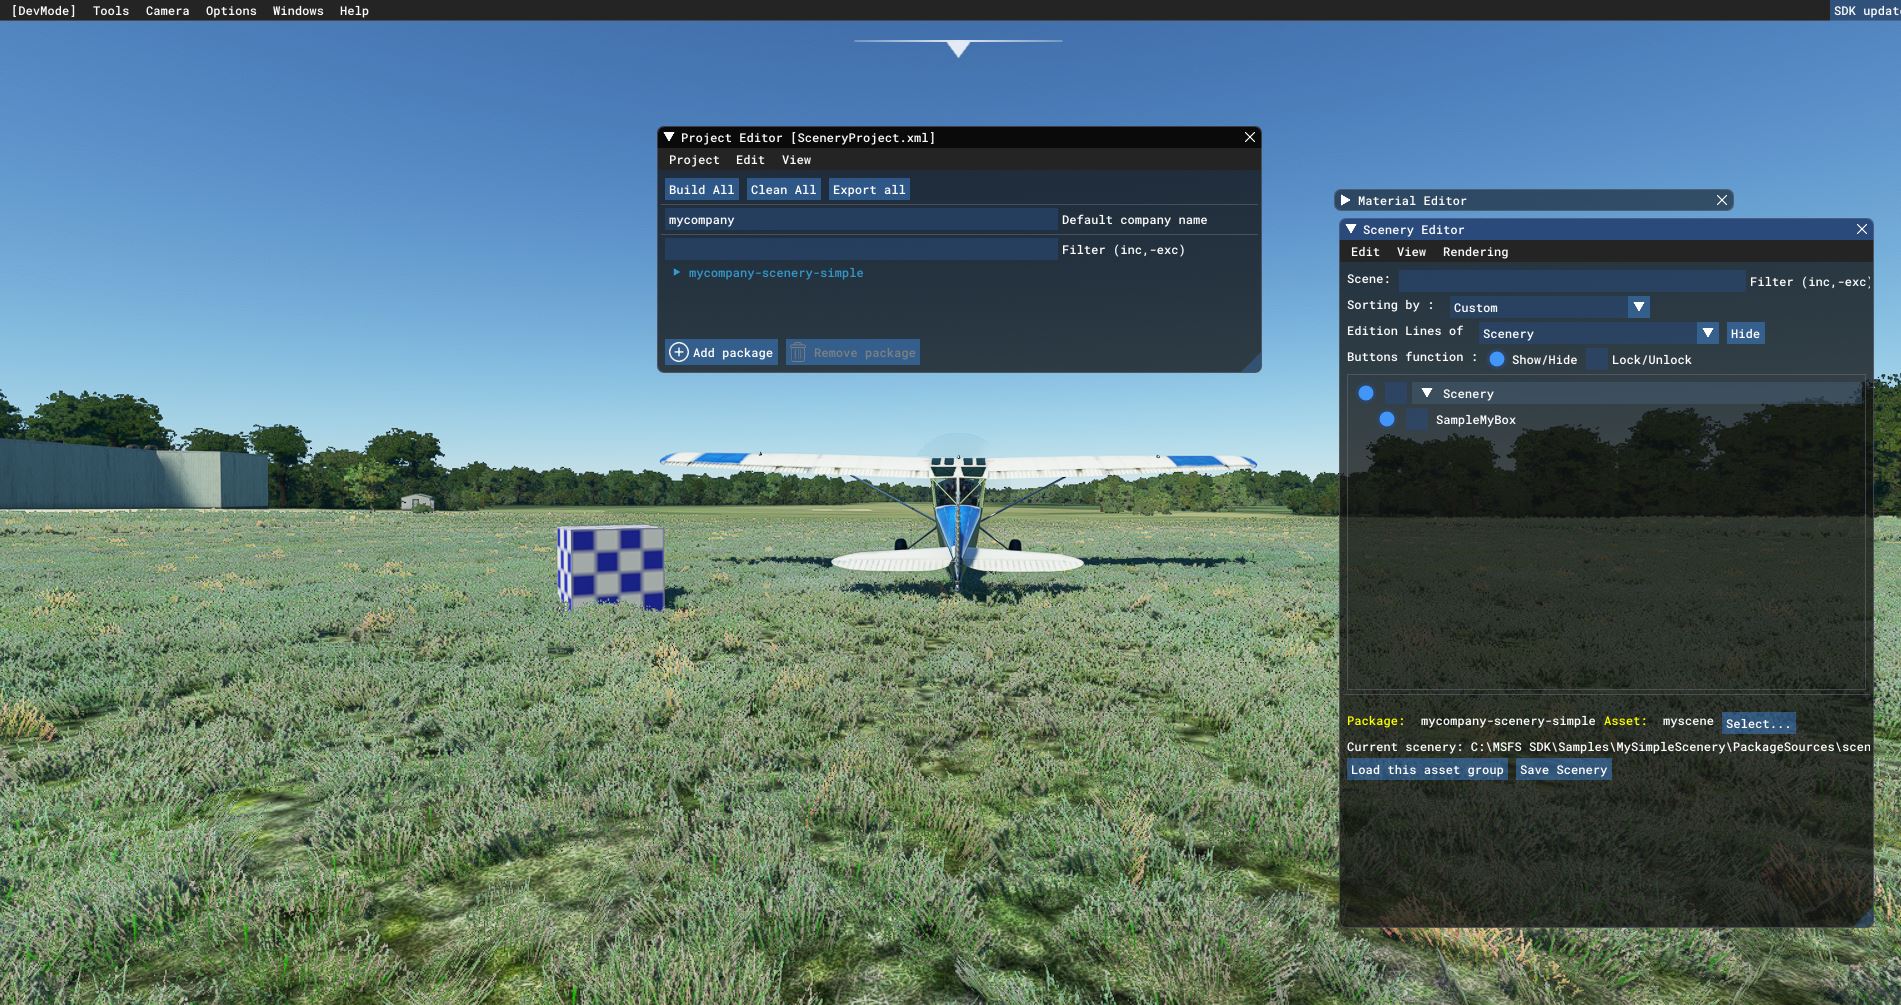
.. the scenery is now loading.. WAIT for this.. when it is finished, you will see the checkers cube
 </img>
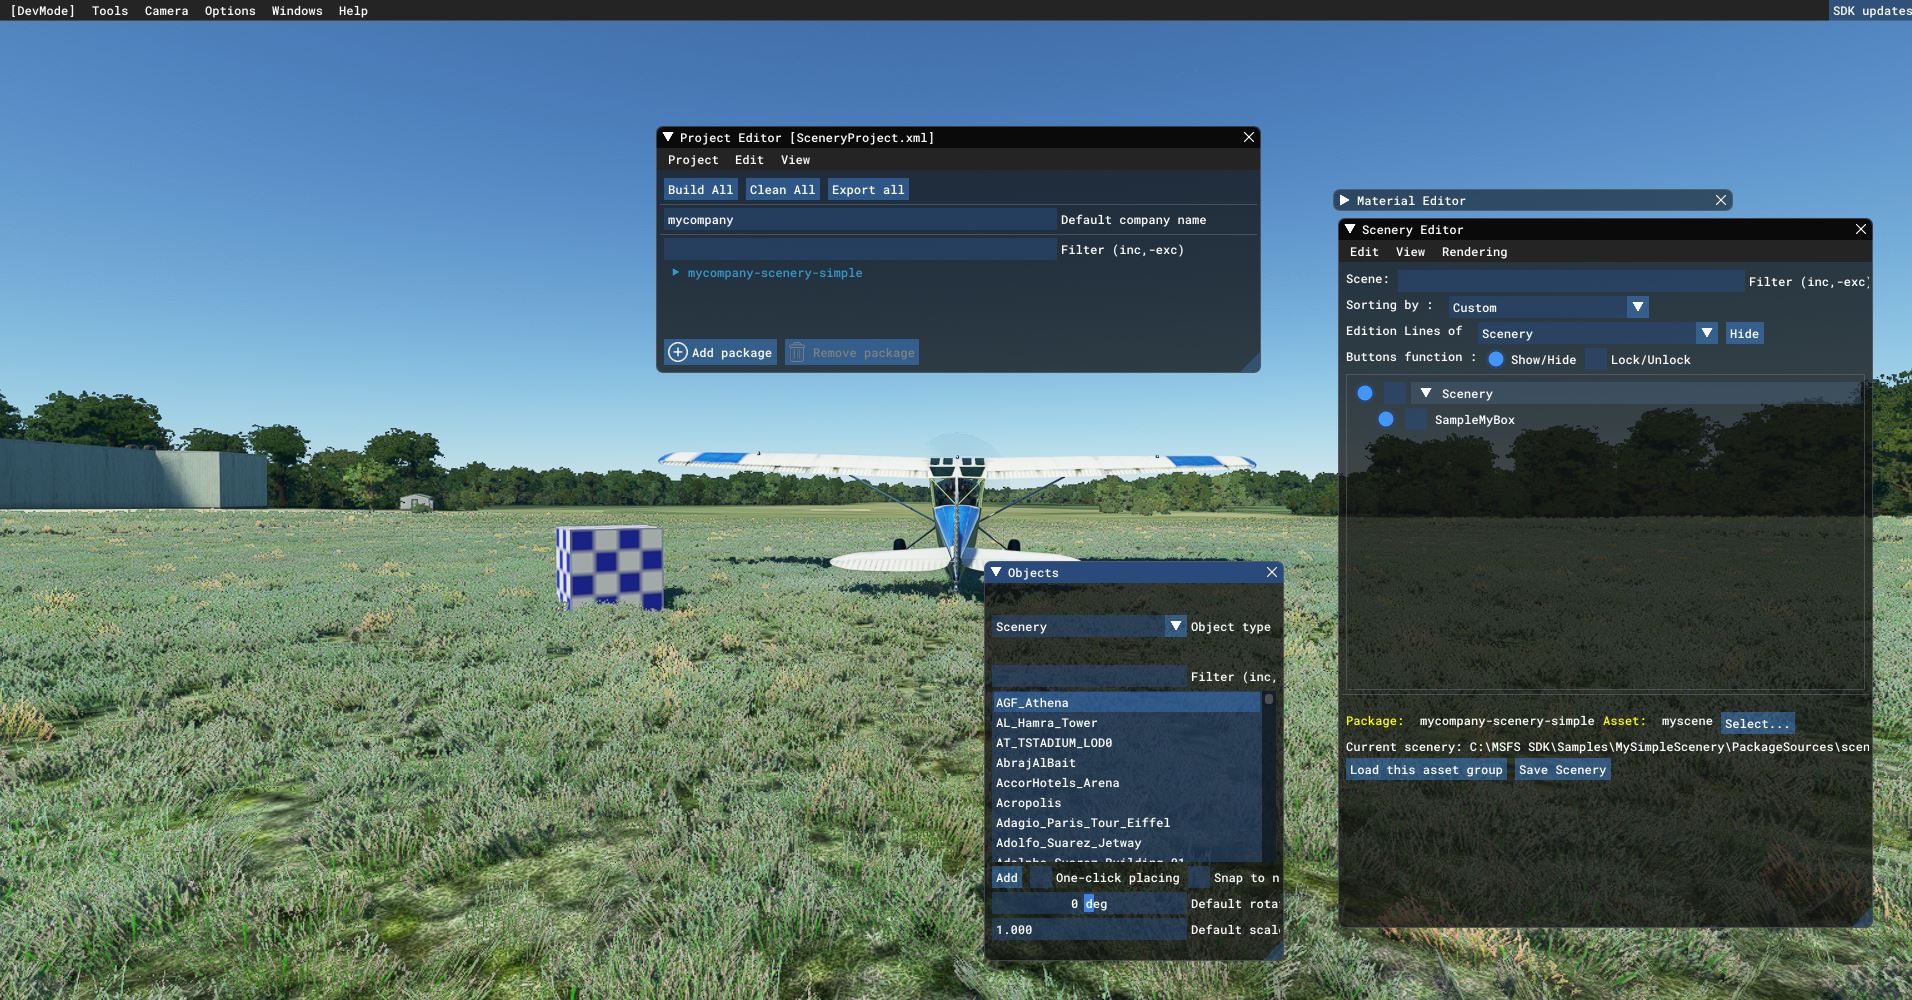
Now, in the Scenery Editor, select menu View - Objects
 </img>
Find your object, by typing the name in the search box. Select it. Then check "One-click placing"
 </img>
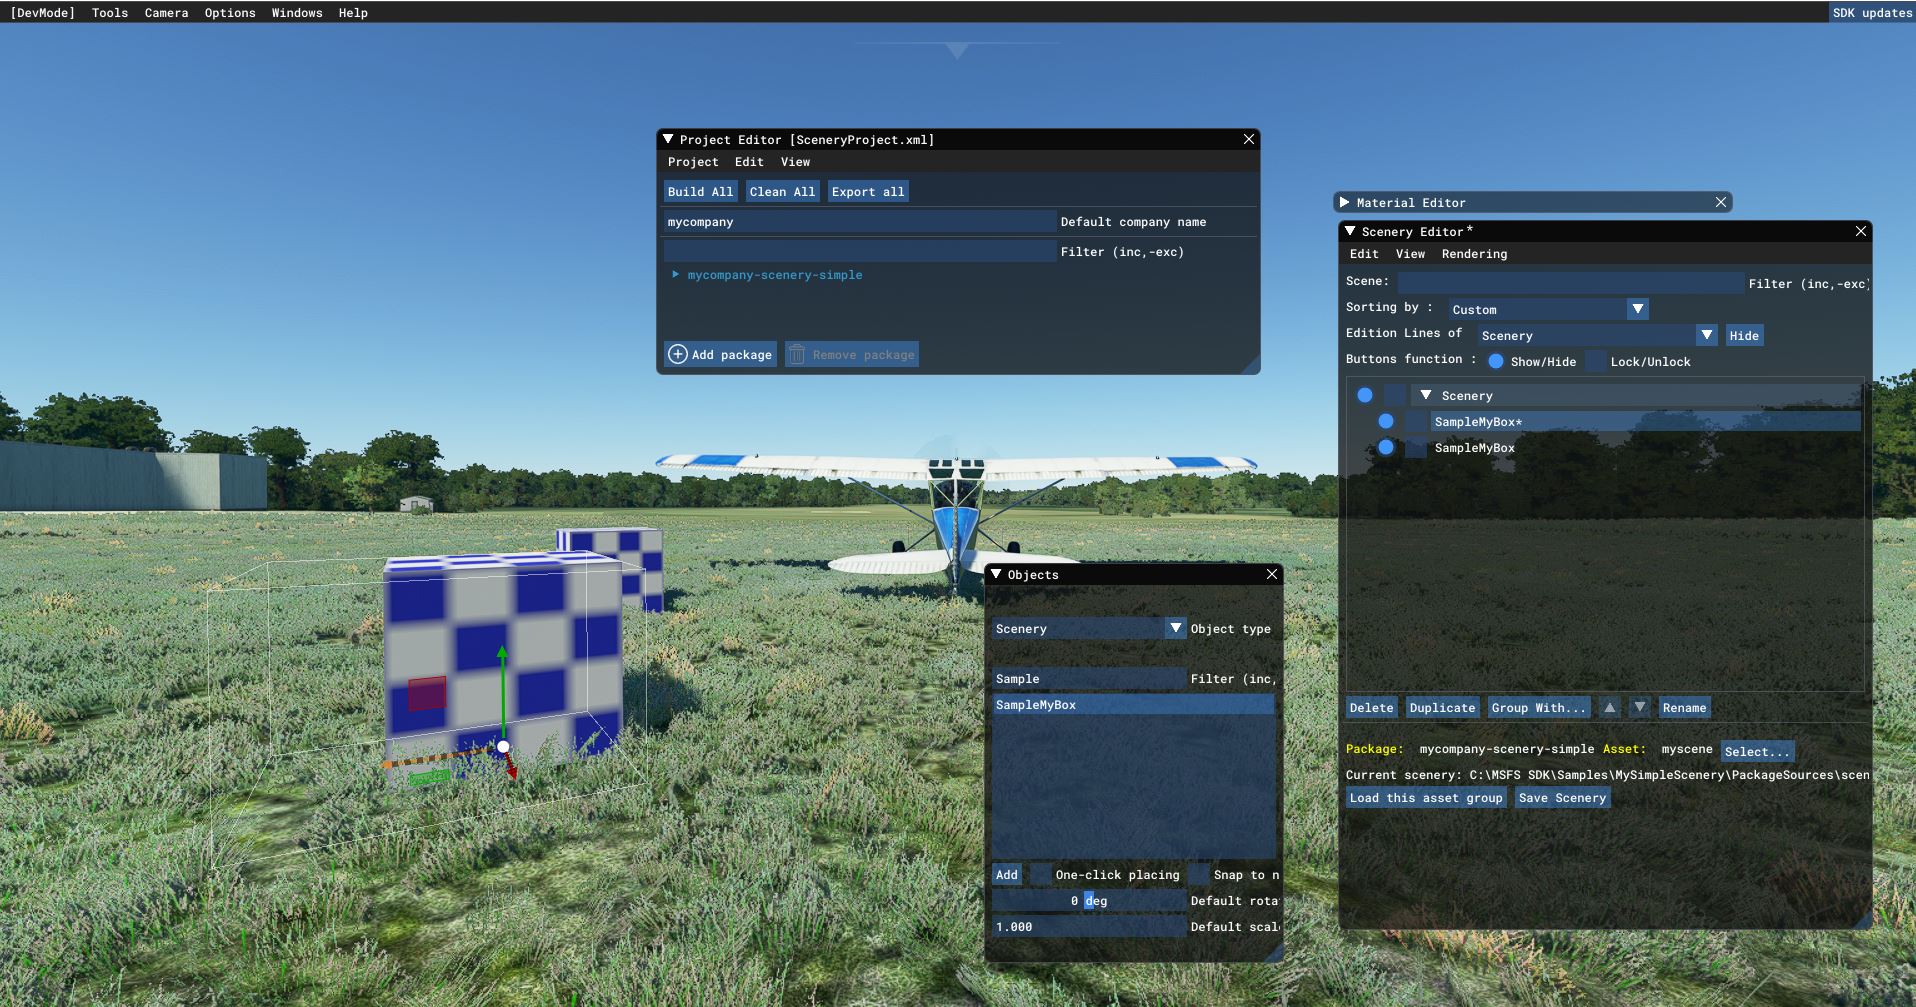
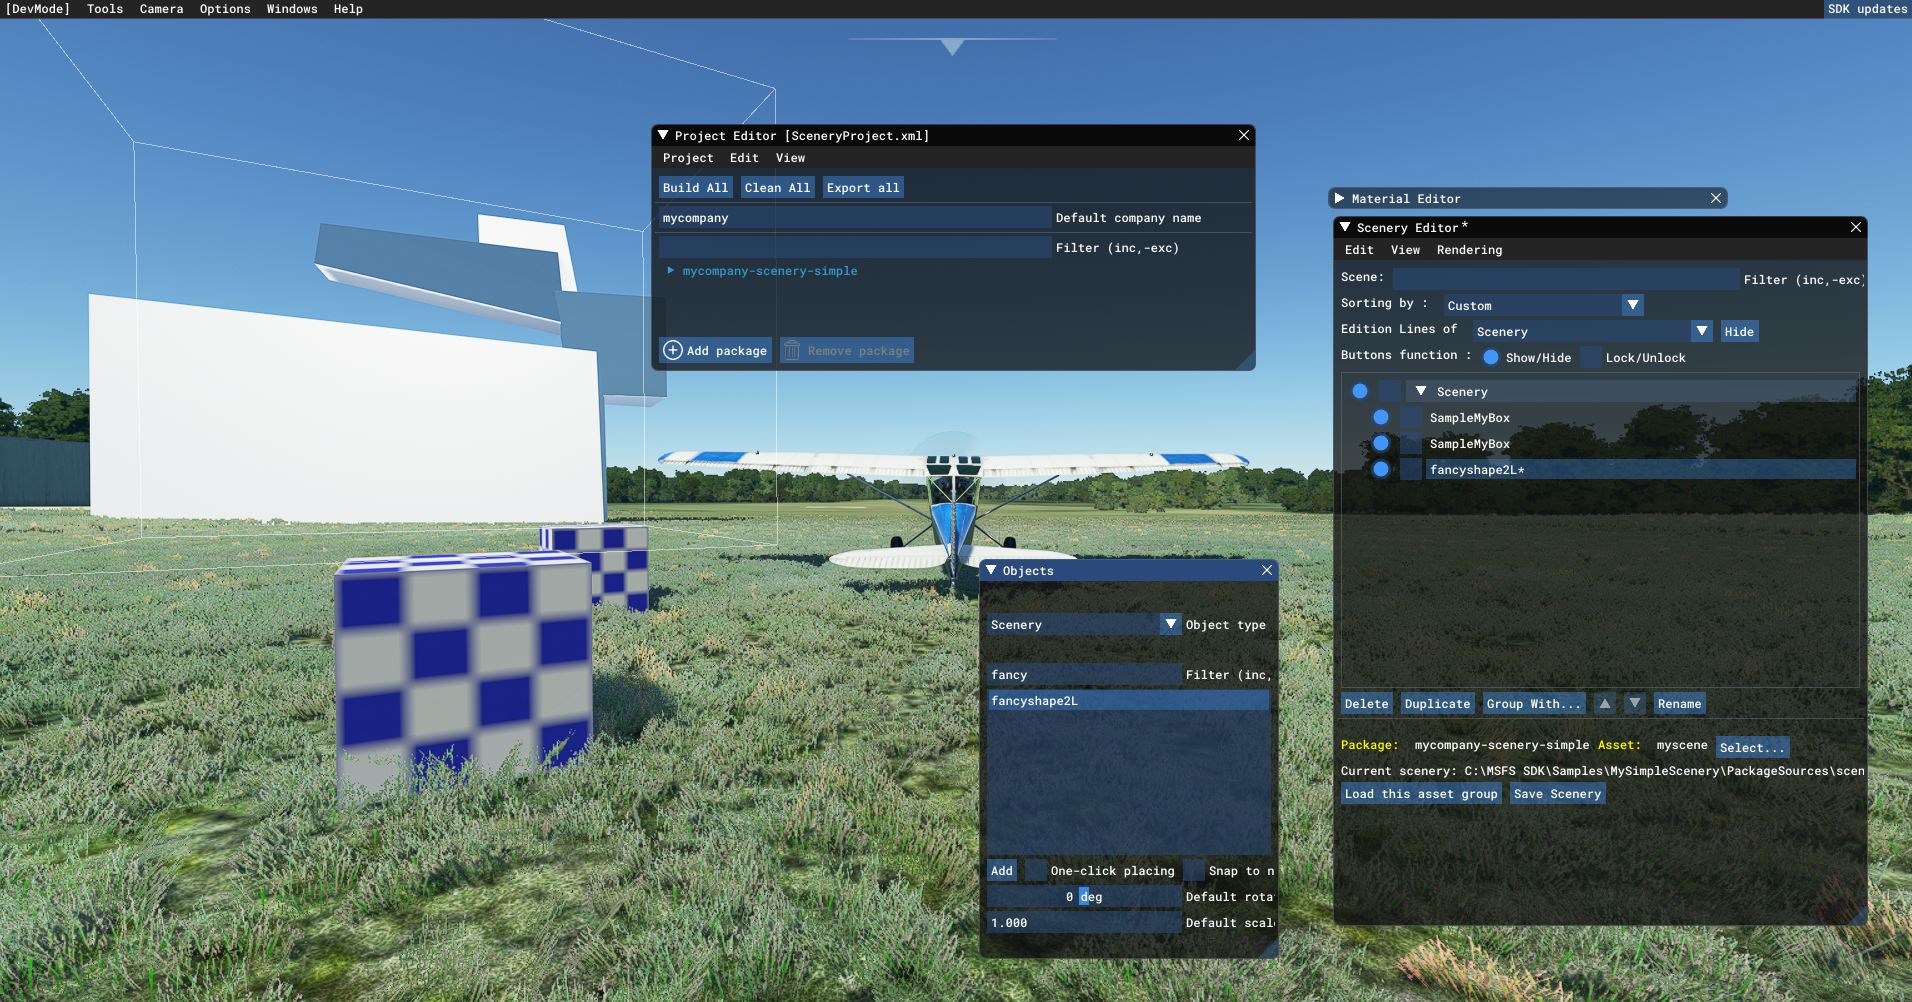
To place an object, left mouse button. Uncheck One-click placing for now. We'll not repeat placement.
Left-click on your object. Using keys W and R you can move and rotate the object..
 </img>
In order to place save your scenery, that is place your object permanently, issue Save Scenery
 </img>
.. and now repeat: Project - Build
</img>
.. and now repeat: Project - BuildAfter doing this, you could leave SDK mode and fly around. Your scenery will remain where it is..
How to modify the example project
Below slides will explain how to add your own Blender design into MSFS Load the landart example you have downloaded in Tutorial #2 (the example Blender Land Art object FancyShape2L.blend)
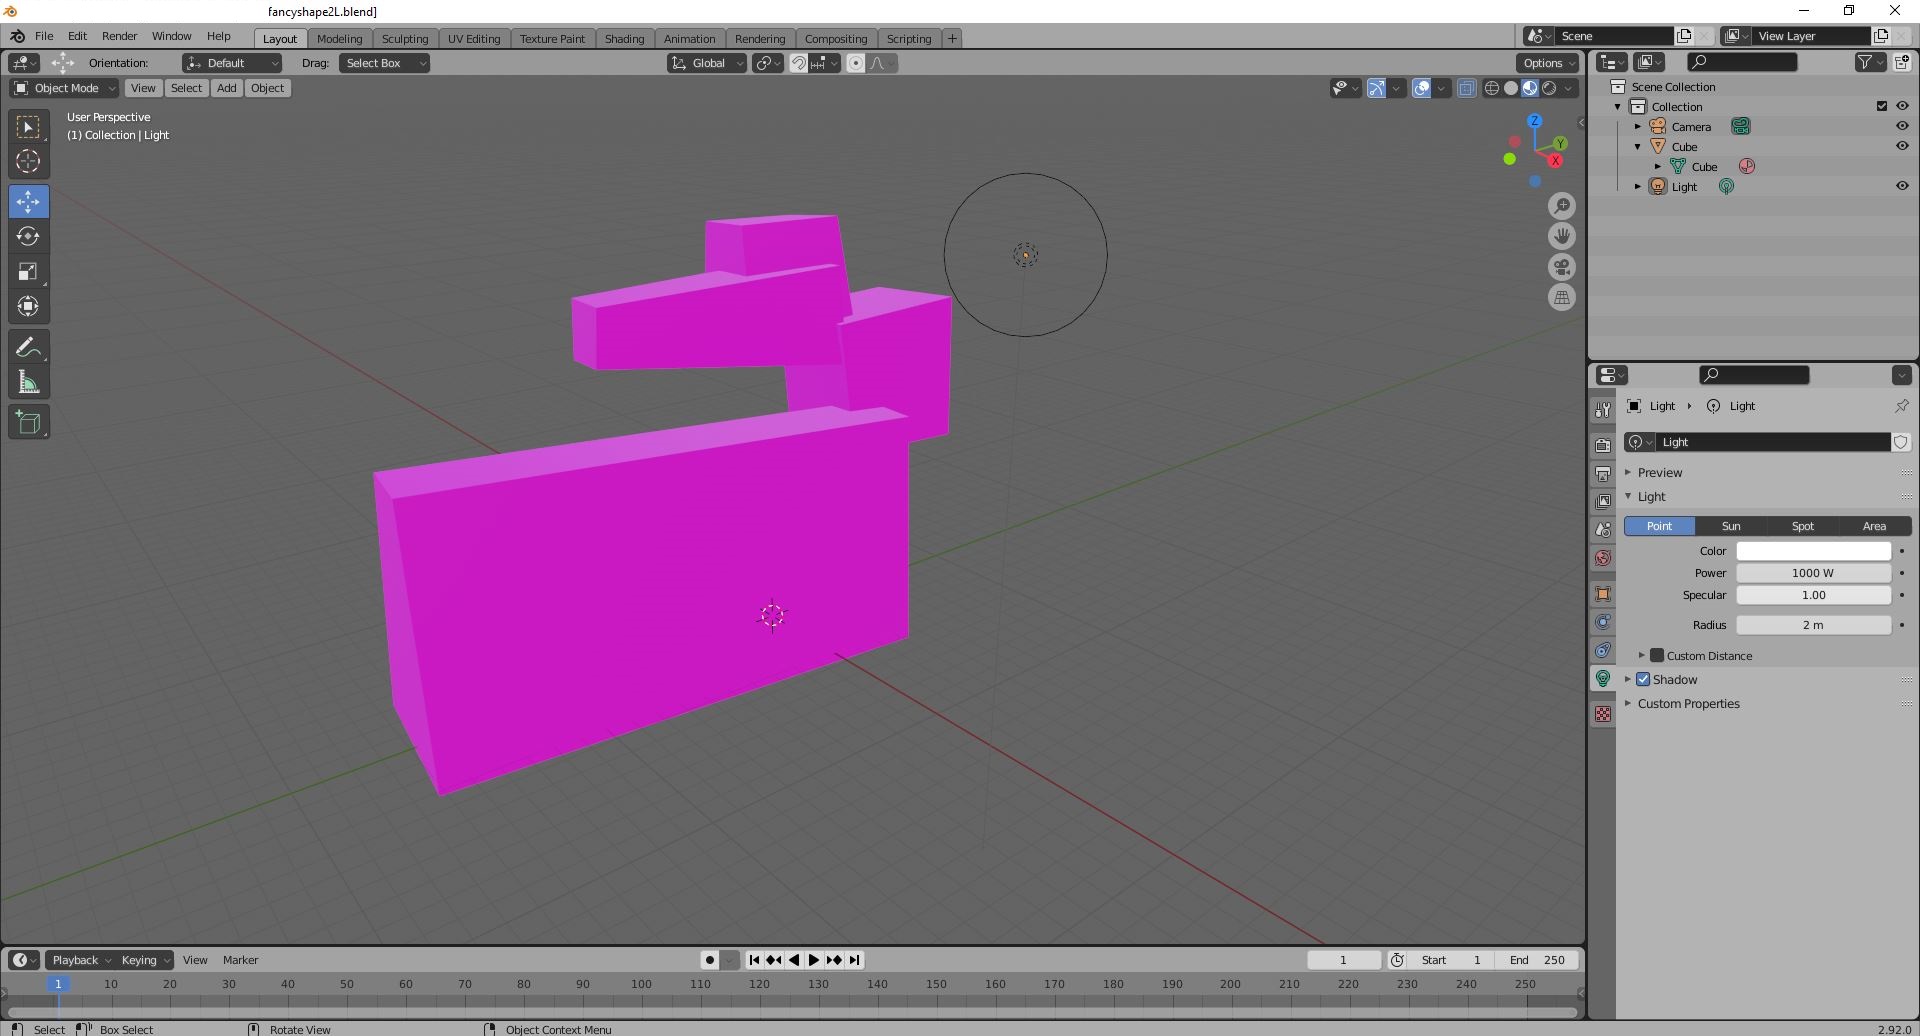 In Blender, you can now modify this object at will. For now, we'll export it to MSFS right away.
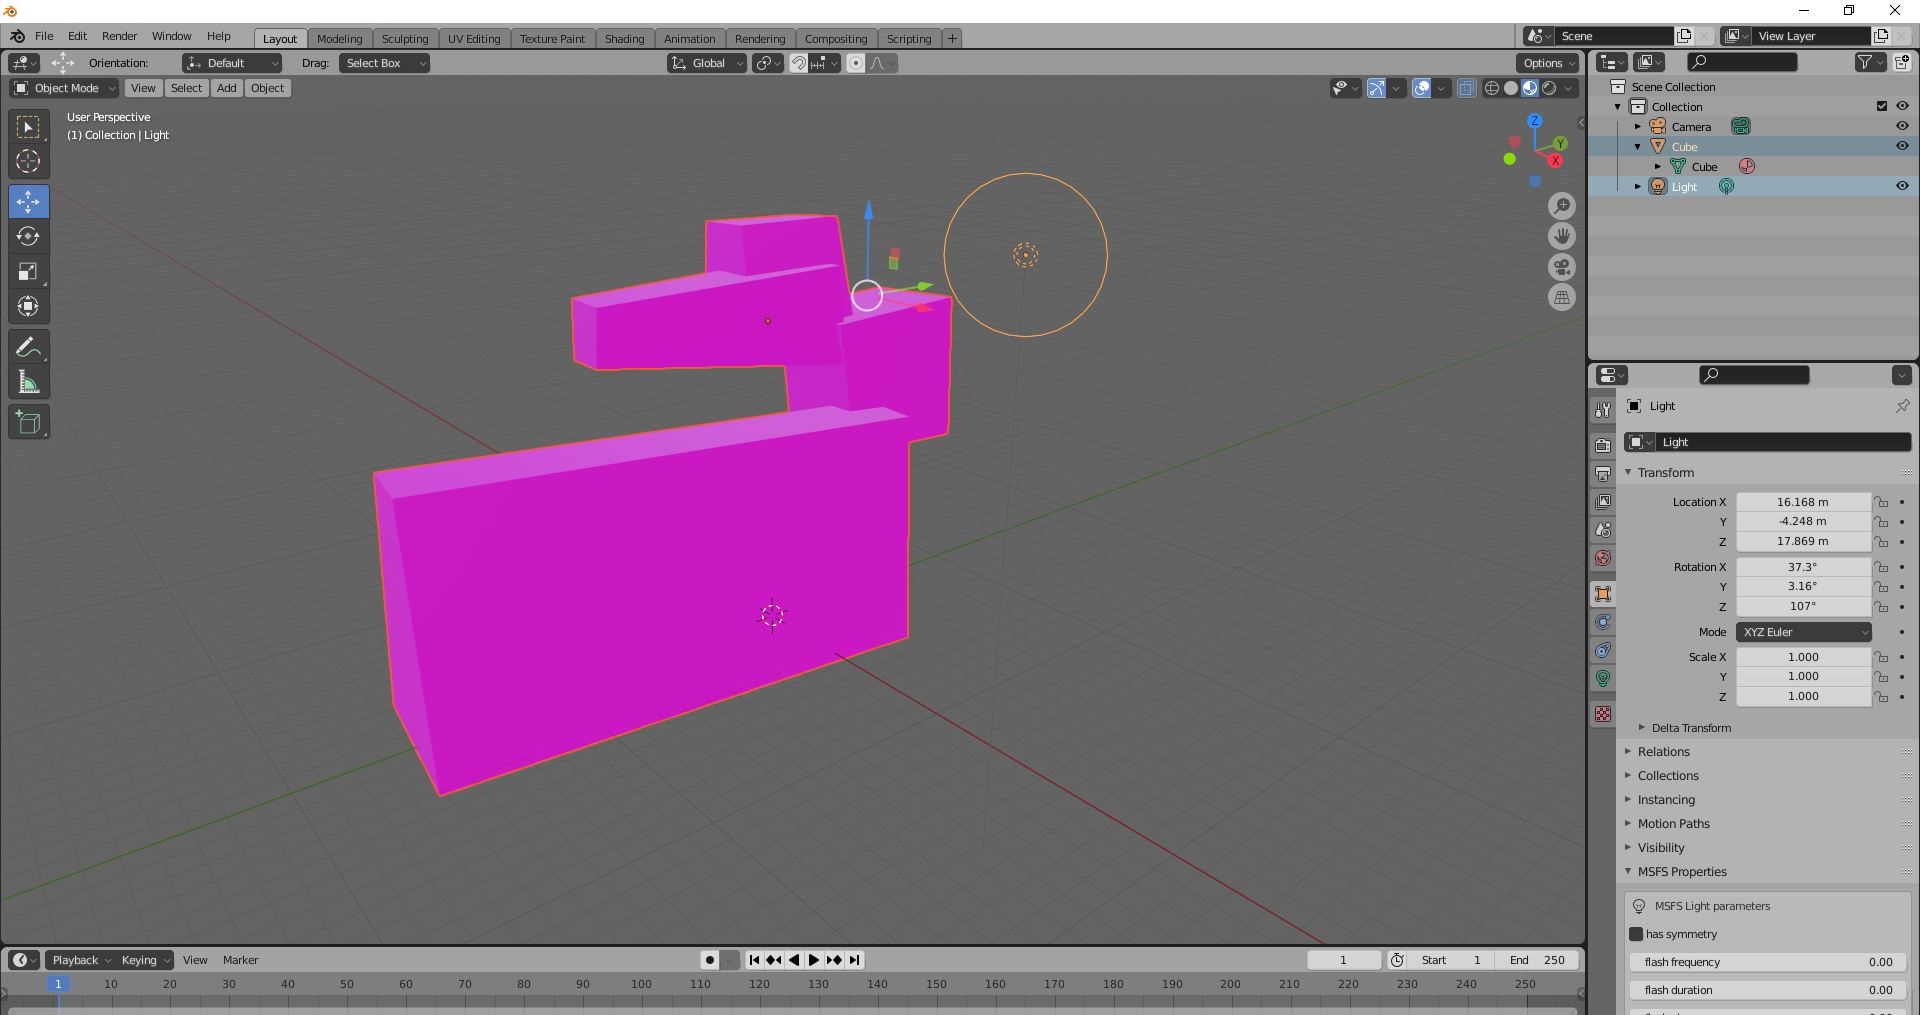
To do that, select both the violet Object and the Light
In Blender, you can now modify this object at will. For now, we'll export it to MSFS right away.
To do that, select both the violet Object and the Light
 Go File menu, select Export. You'll get options to export glBT to MSFS. If you don't get this export option, check Tutorial #2 and download the addin for Blender.
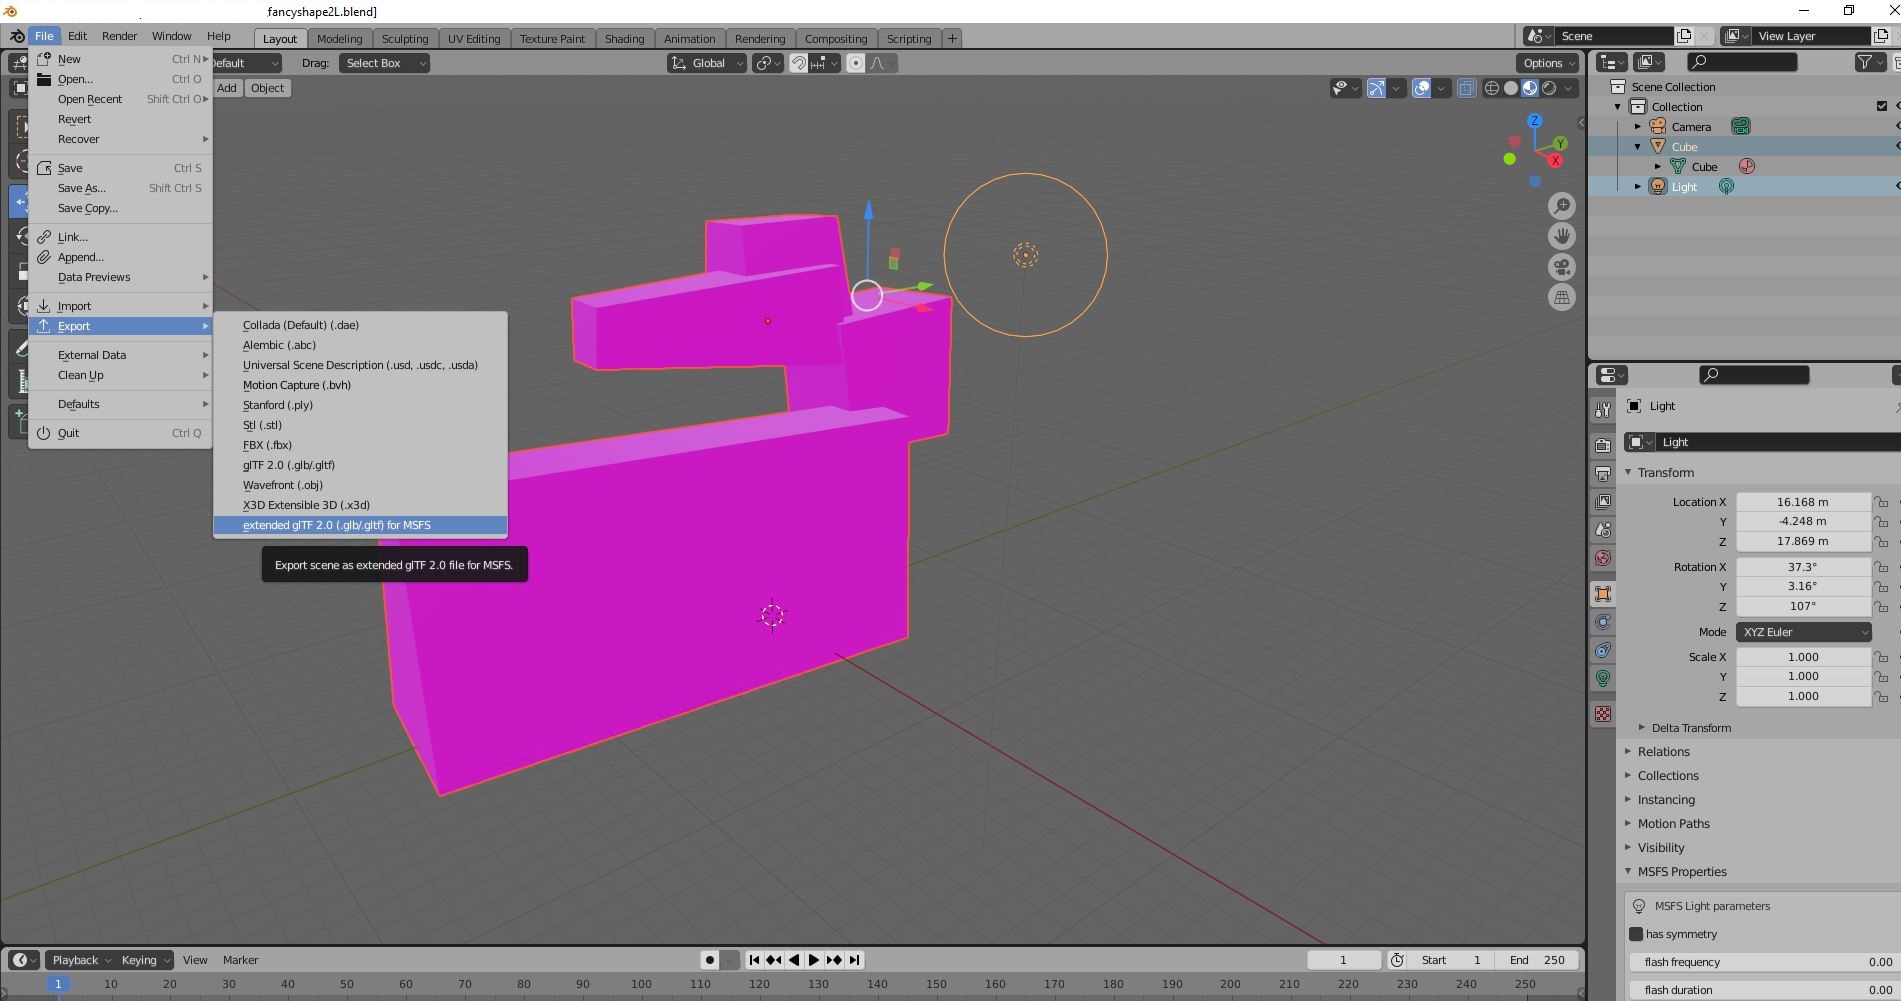 On the right, some options are shown. Make sure you
- click the XML option
- fillin the name of your object as XML name (in this case: FancyShape2L)
- Check the option to export selected objects
On the right, some options are shown. Make sure you
- click the XML option
- fillin the name of your object as XML name (in this case: FancyShape2L)
- Check the option to export selected objects
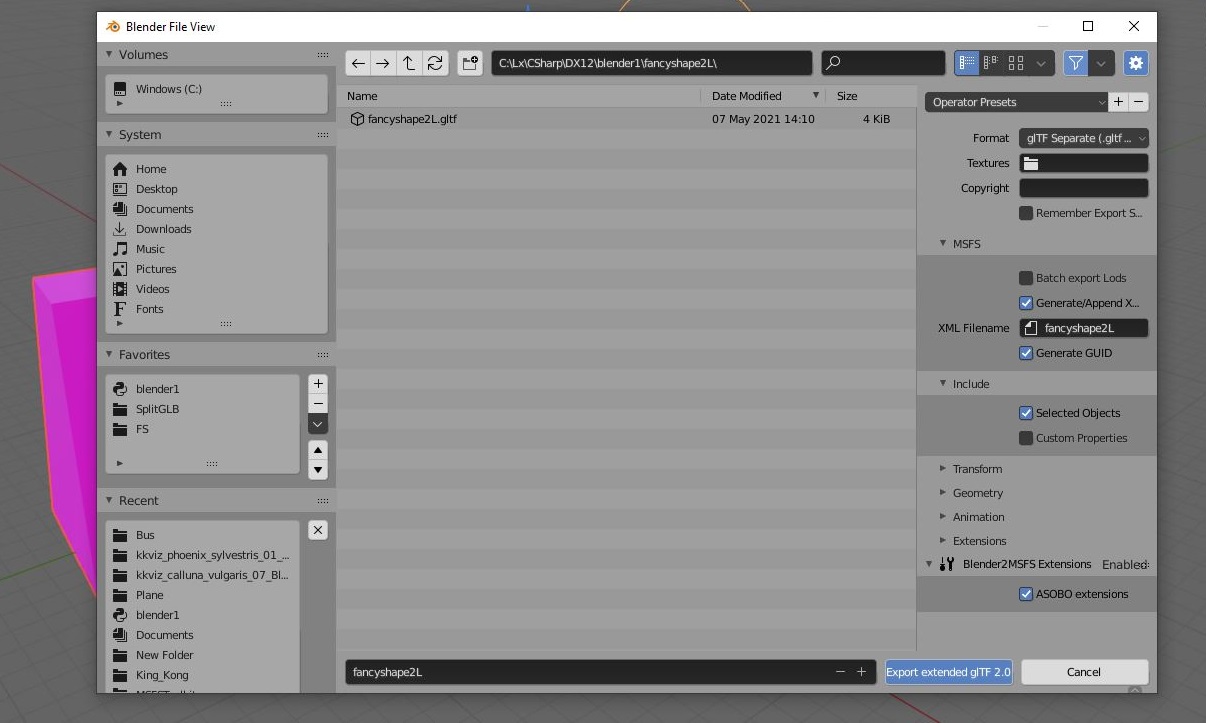 Now click the blue button Export extended glTF 2.0. Put the three result files into a new subdirectory PackageSources\modellib\fancyshape2L in the MSFS project.
 In the MSFS developer session, you Close and Open the project, click Build and check the console. Then load assets. You will find fancyshape2L
in the objects box and you'll be able to place it !
In the MSFS developer session, you Close and Open the project, click Build and check the console. Then load assets. You will find fancyshape2L
in the objects box and you'll be able to place it !
How to export to Community
When you want to re-use your scenery every time MSFS is loaded, you can use the Project Editor Export option, which
will create a ready made ZIP-file for Community in \Packages folder in your project.